Video-Anleitung
Anleitung / Instructions
Für die Inbetriebnahme des Displays muss es korrekt mit einem USB-C-Kabel mit Strom versorgt werden. Das Display startet und zeigt standardmäßig die Poster an.
To start up the display, it must be correctly powered with a USB-C cable. The display starts and shows the posters by default.
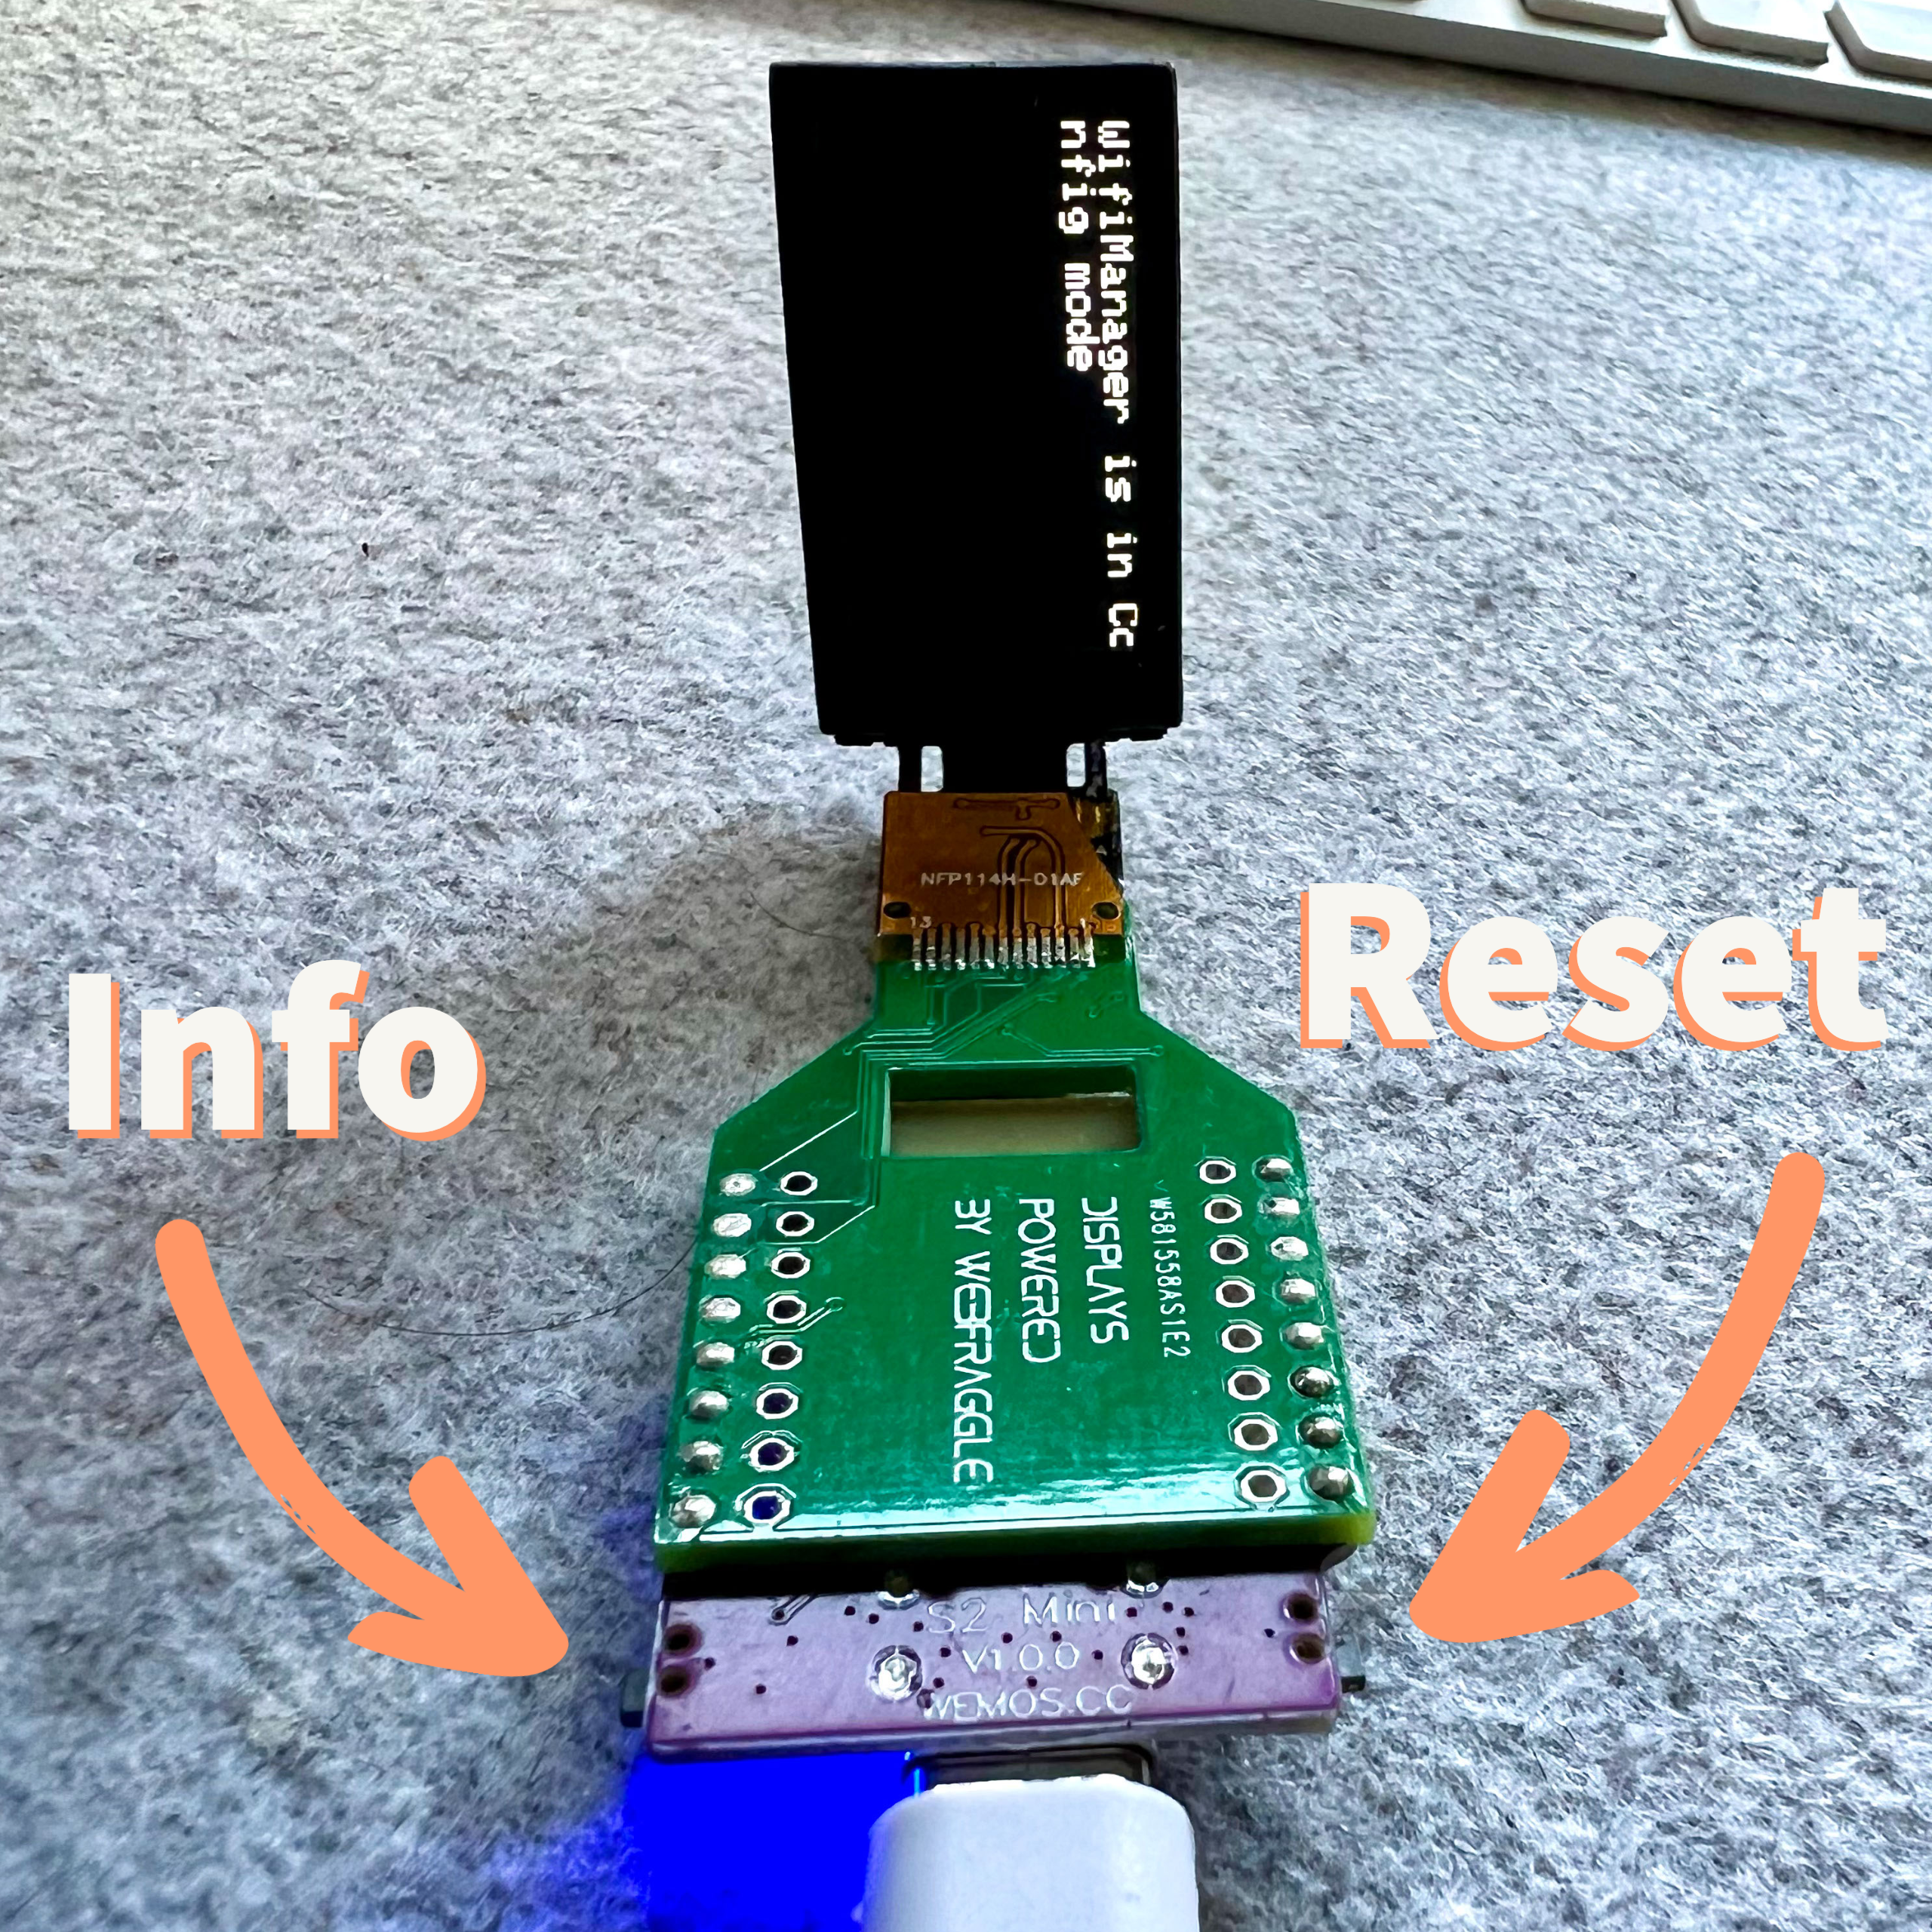
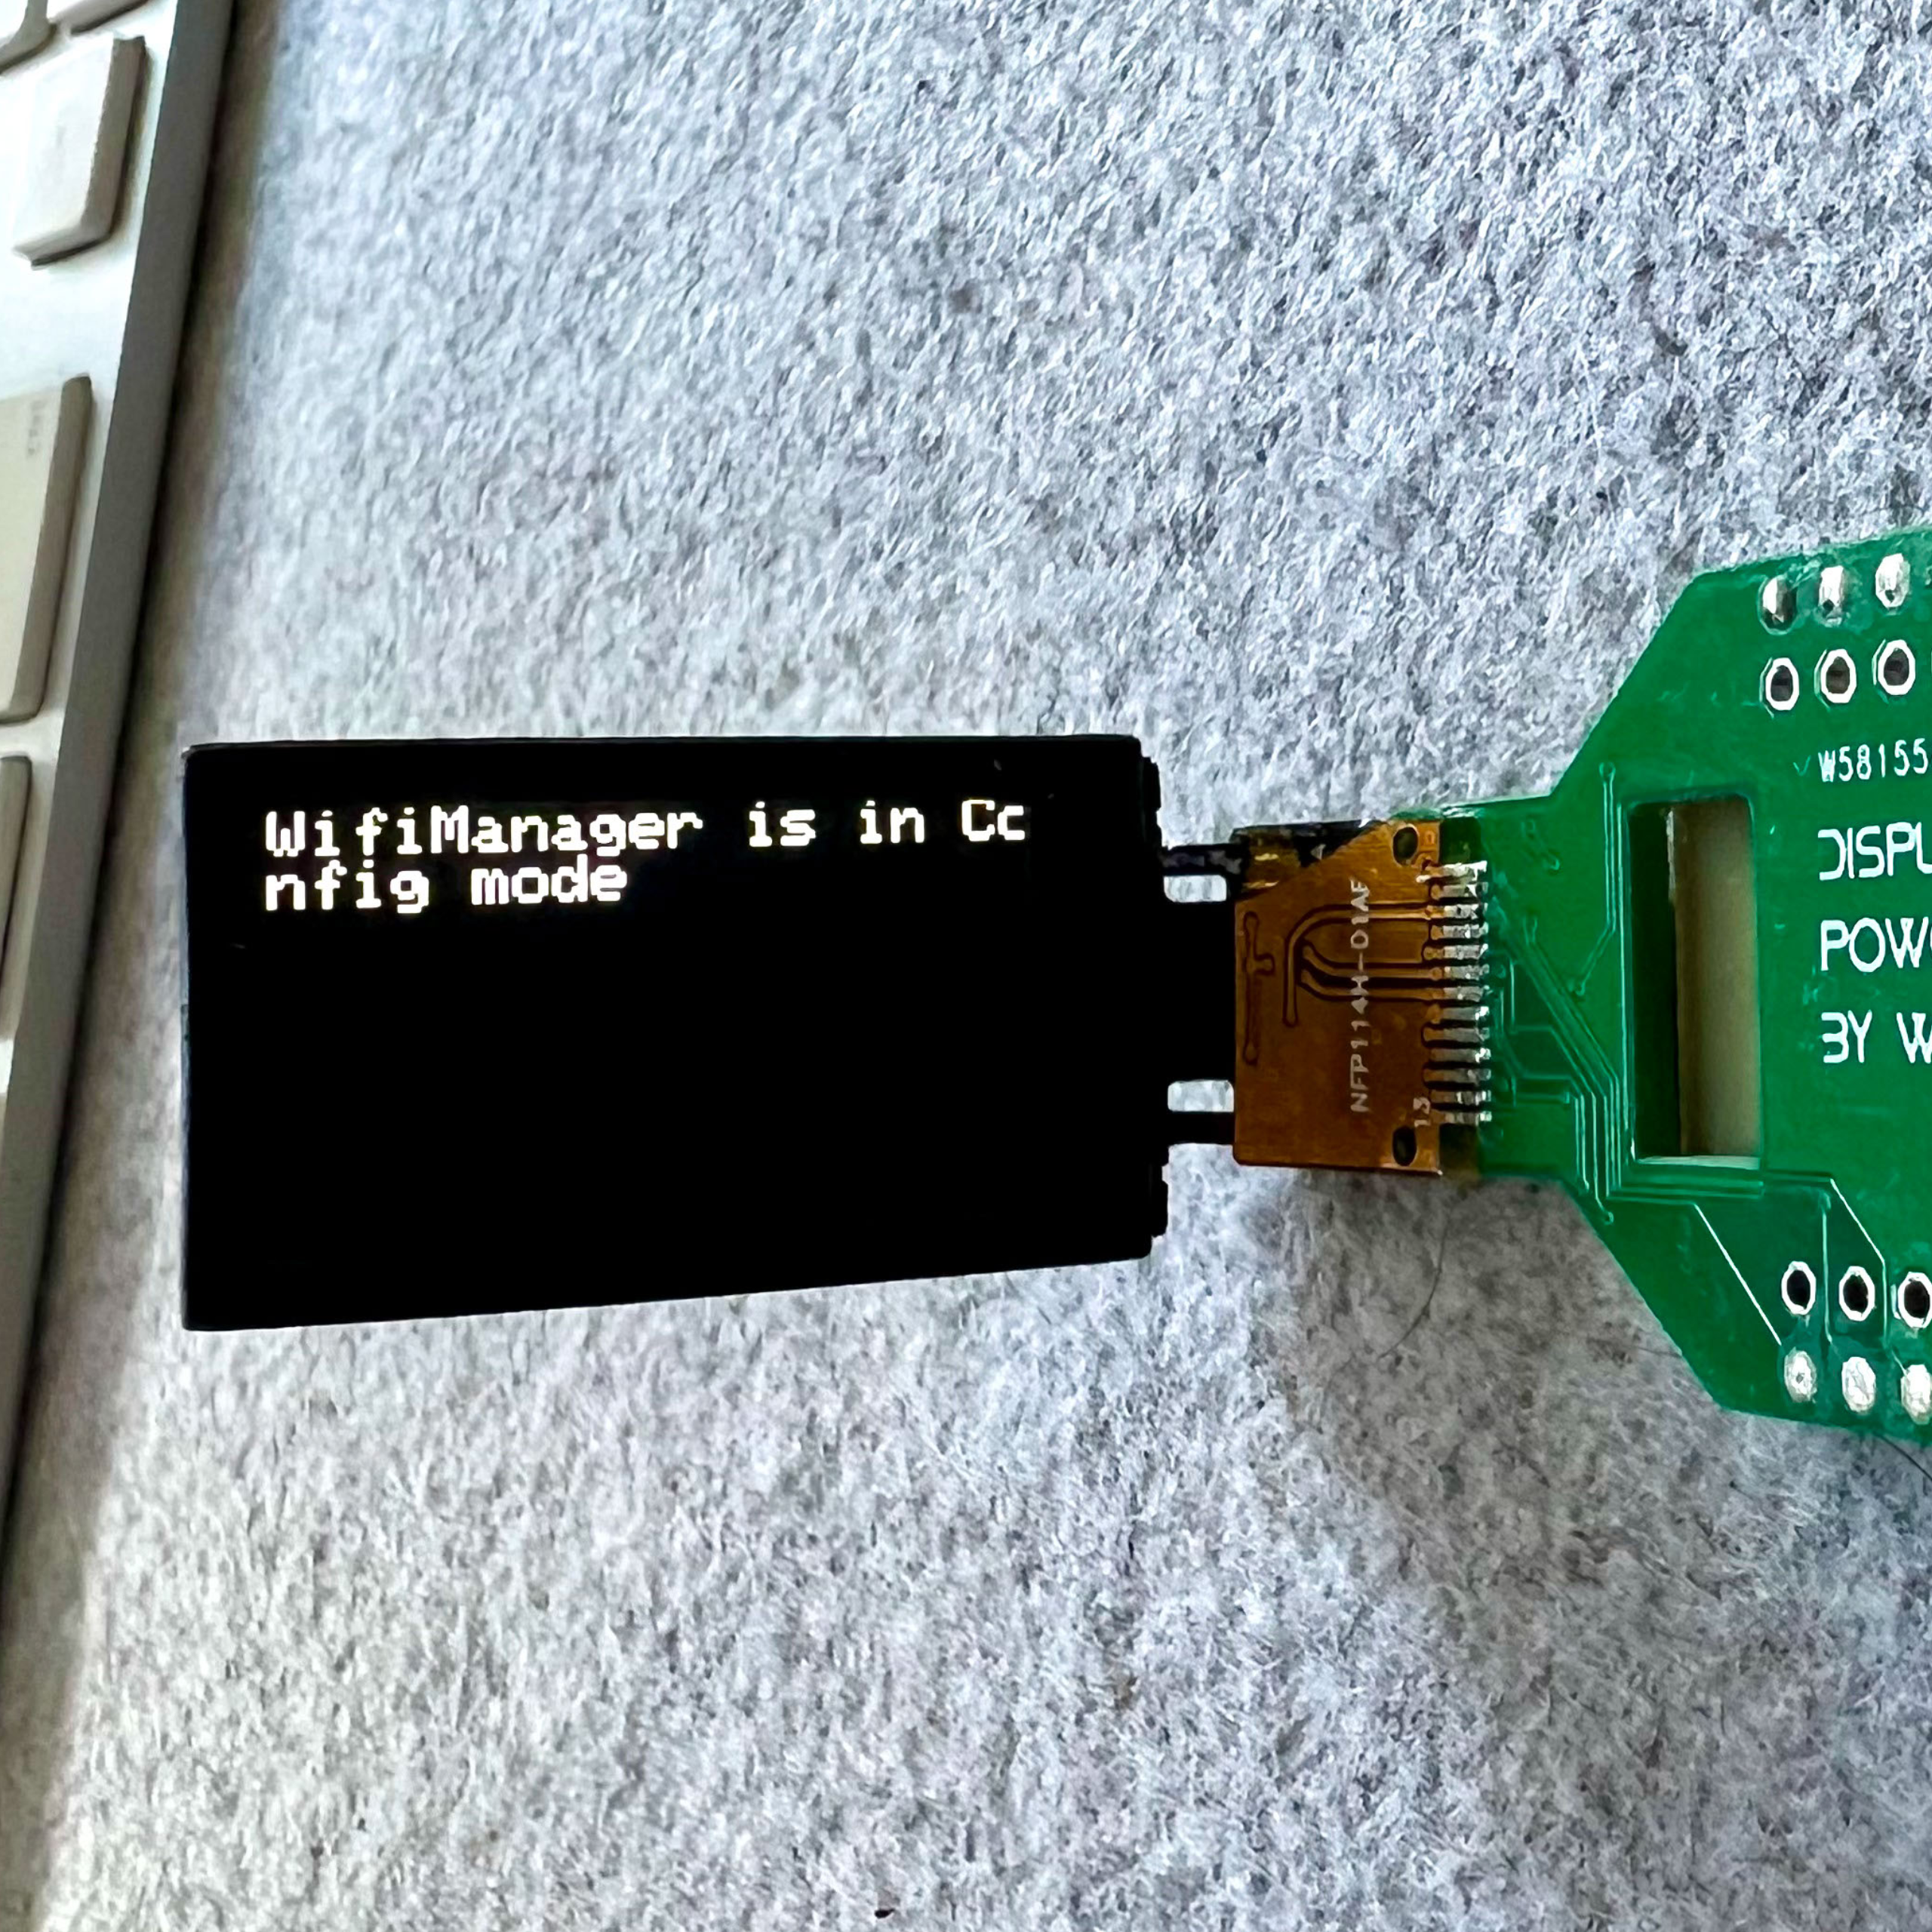
Durch Drücken des Info-Knopfes zeigt das Display den WLAN-Status. Im Konfigurationsmodus erstellt das Modul einen eigenen WLAN-Access-Point, mit dem Du Dich verbinden kannst, um die WLAN-Einstellungen Deines Heimnetzwerks einzugeben.
By pressing the info button, the display shows the WLAN status. In configuration mode, the module creates its own Wi-Fi access point to which you can connect to enter the Wi-Fi settings of your home network.
Um das Display über einen Browser zu konfigurieren, musst Du es mit Deinem heimischen WLAN verbinden. Dazu musst Du die WLAN-Informationen eingeben. Zuerst musst Du Dich mit dem Access-Point des Steuerungsmoduls per WLAN verbinden. Das kannst Du mit einem beliebigen Gerät machen. In den Screenshots benutzen ich ein iPhone.
To configure the display via a browser, you must connect it to your home WLAN. To do this, you must enter the WLAN information. First you must connect to the access point of the control module via WLAN. You can do this with any device. In the screenshots I use an iPhone.
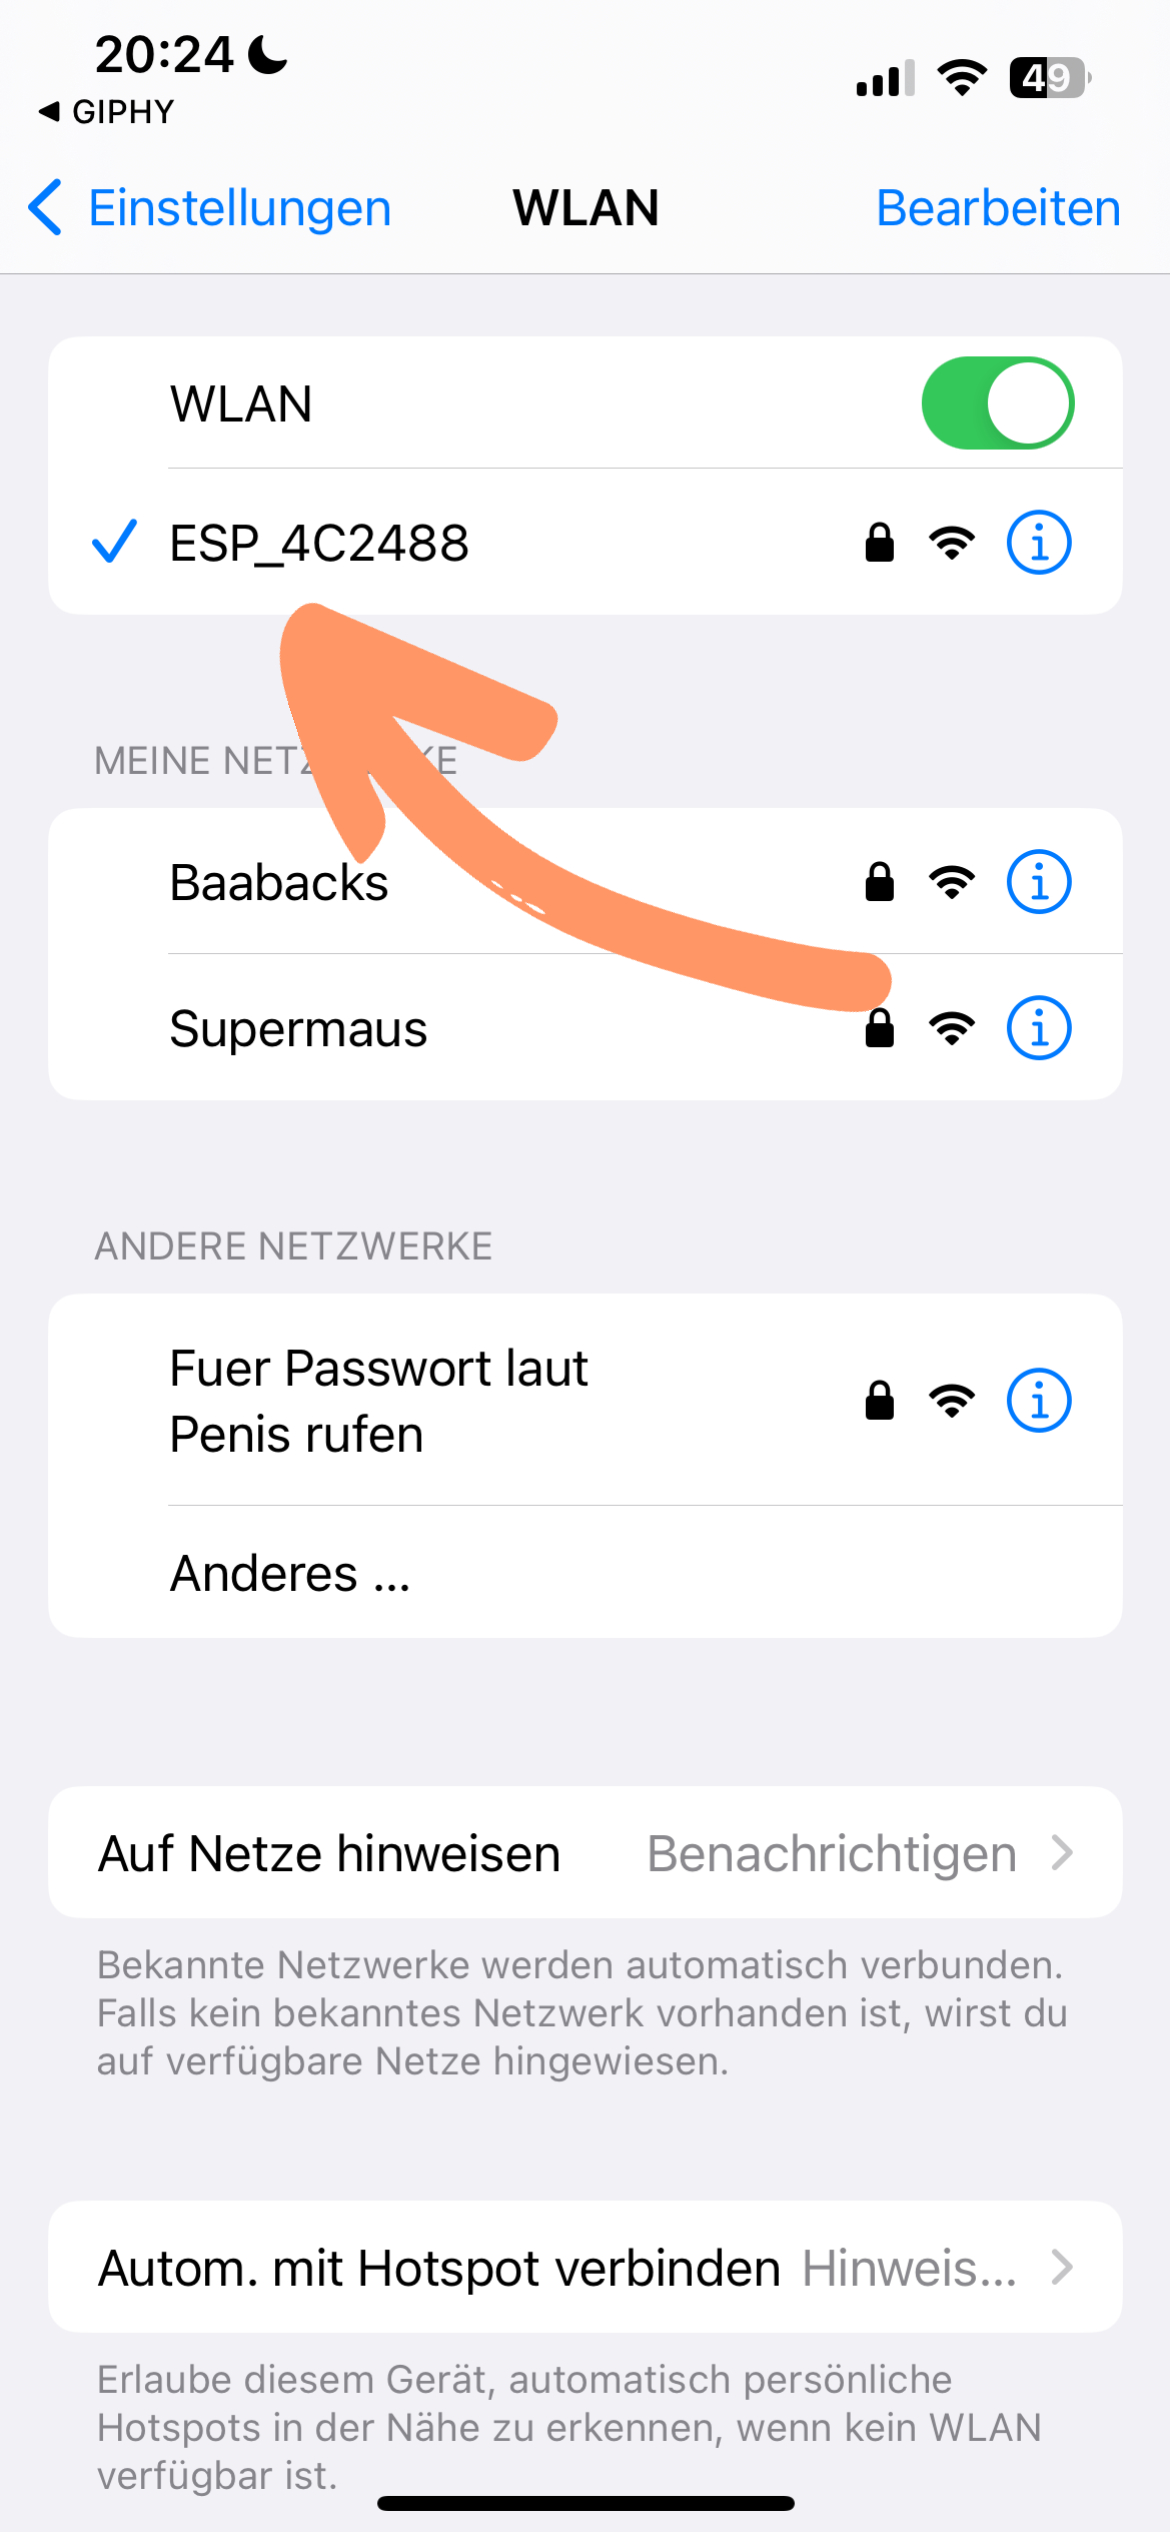
Um Dich mit dem Access-Point zu verbinden, gehst Du in die WLAN-Einstellungen und wählst das WLAN-Netzwerk ESP_XXXXXX aus. Jedes Modul hat einen anderen Namen, deshalb benutzen ich hier Platzhalter.
To connect to the access point, go to the WLAN settings and select the WLAN network ESP_XXXXXX. Each module has a different name, so I use placeholders here.
Das Passwort des WLANs ist MyESP_XXXXXX
The password of the WLAN is MyESP_XXXXXX
Die sechs X müssen durch die letzten sechs Buchstaben und Ziffern des WLAN-Namens des Moduls ersetzt werden. Im Beispiel wäre das „MyESP_4C2488“.
The six Xs must be replaced by the last six letters and digits of the WLAN name of the module. In the example this would be „MyESP_4C2488“.

Öffne danach Deinen Browser und gib die URL http://192.168.4.1 ein.
Then open your browser and enter the URL http://192.168.4.1.

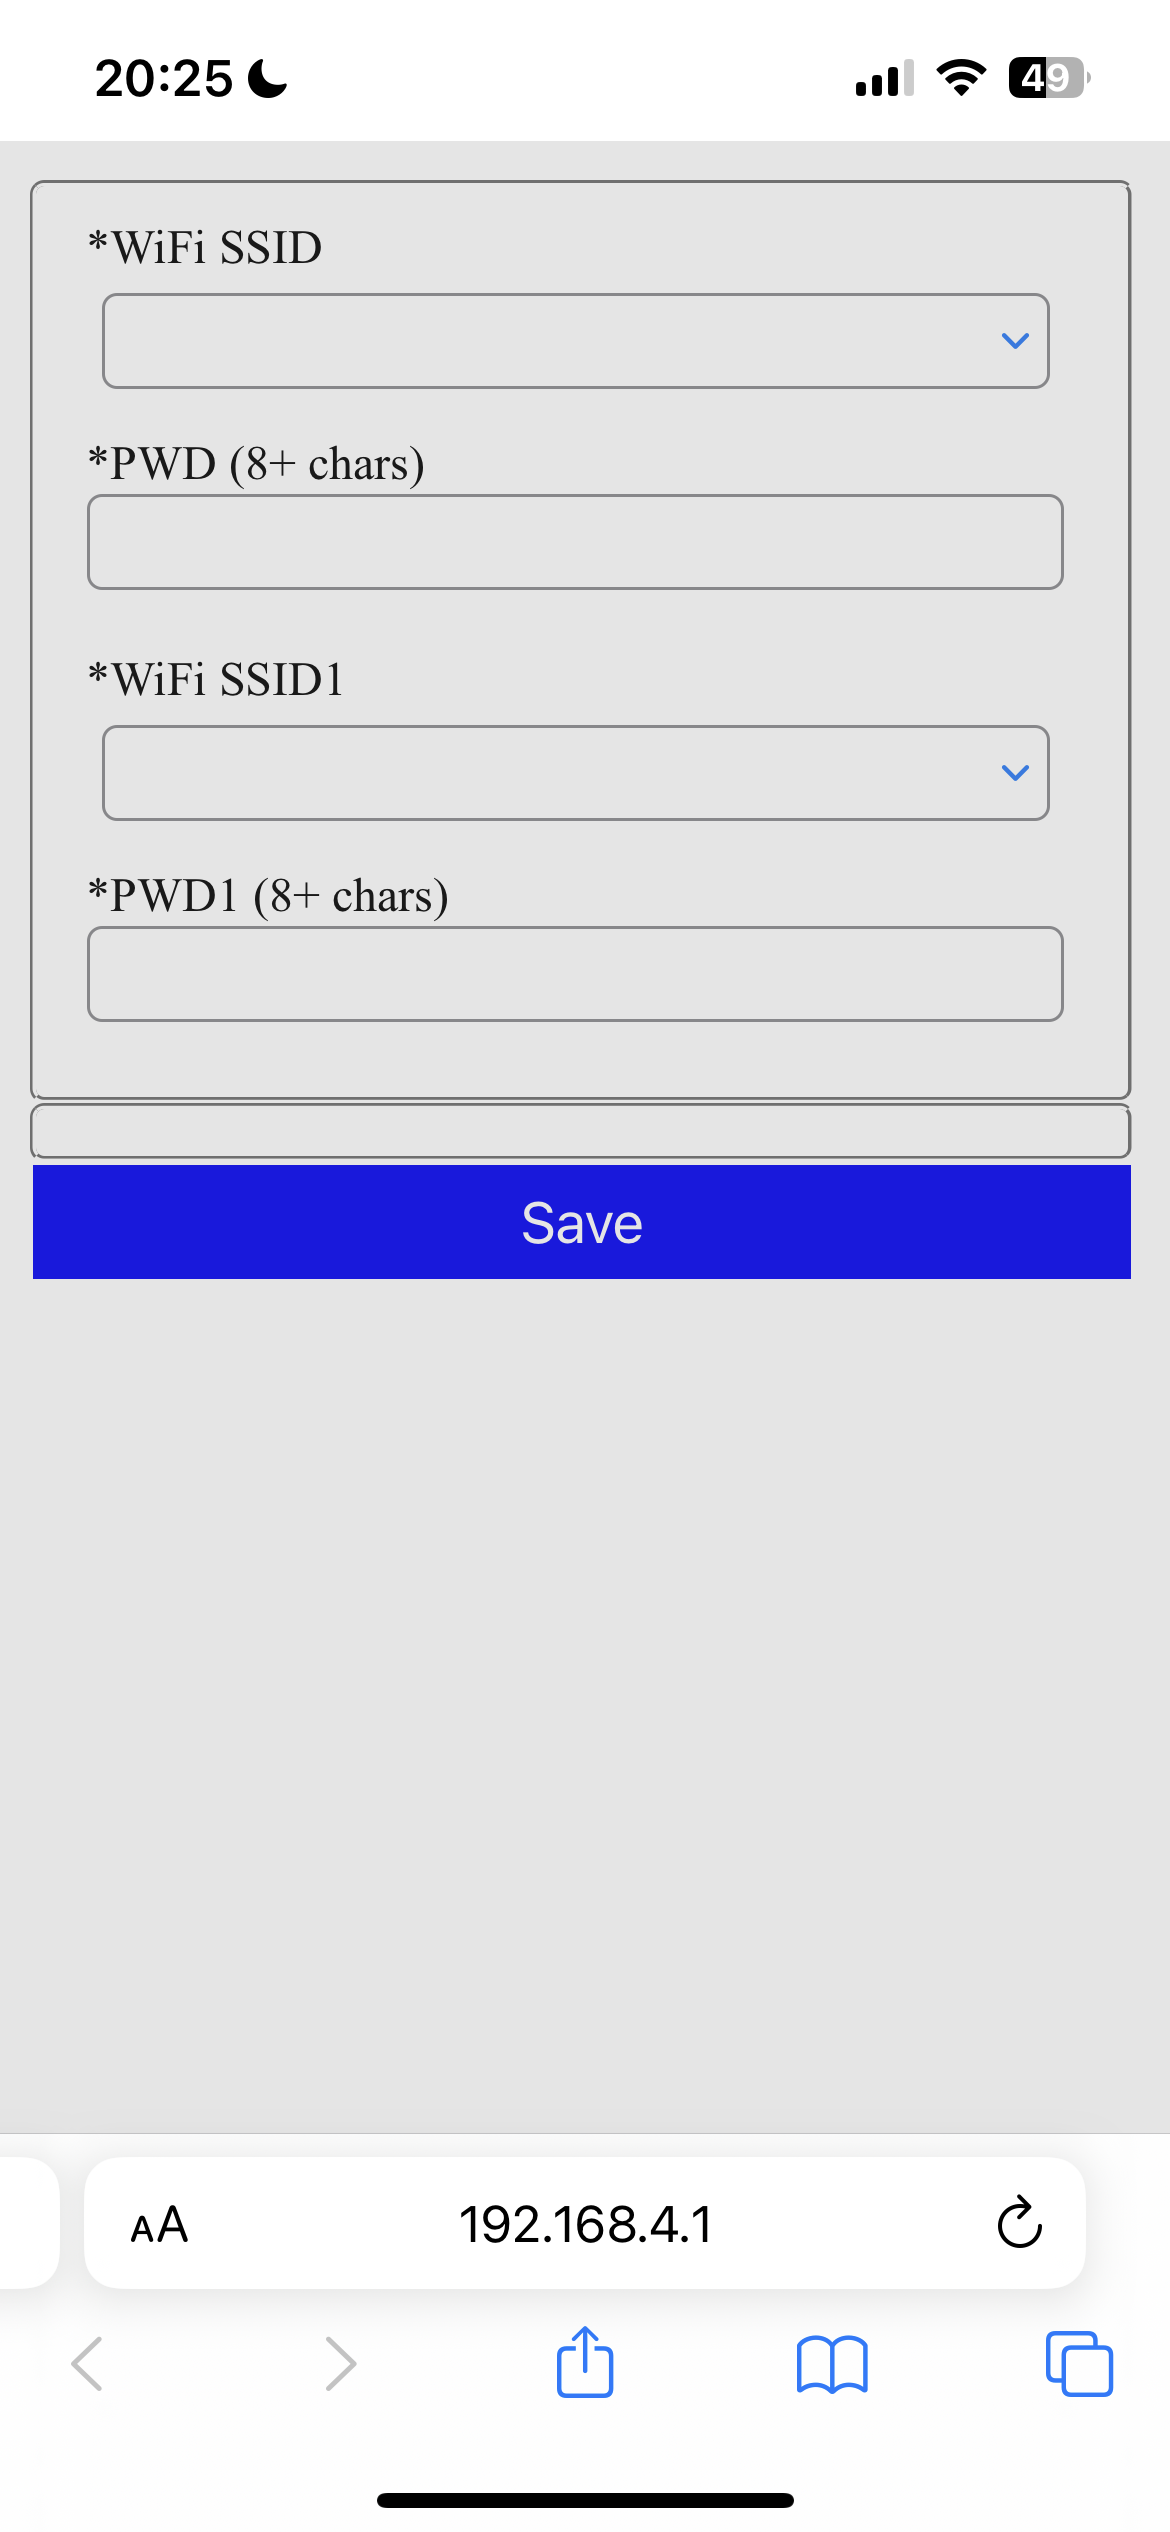

Wähle über das Dropdown „WiFi SSID“ Dein heimisches WLAN aus und gib im Feld „PWD“ das WLAN-Passwort Deines Heimnetzwerks ein. Drücke auf den Save-Button, um die Einstellungen zu speichern. Danach startet das Modul neu und versucht, sich mit Deinem WLAN zu verbinden.
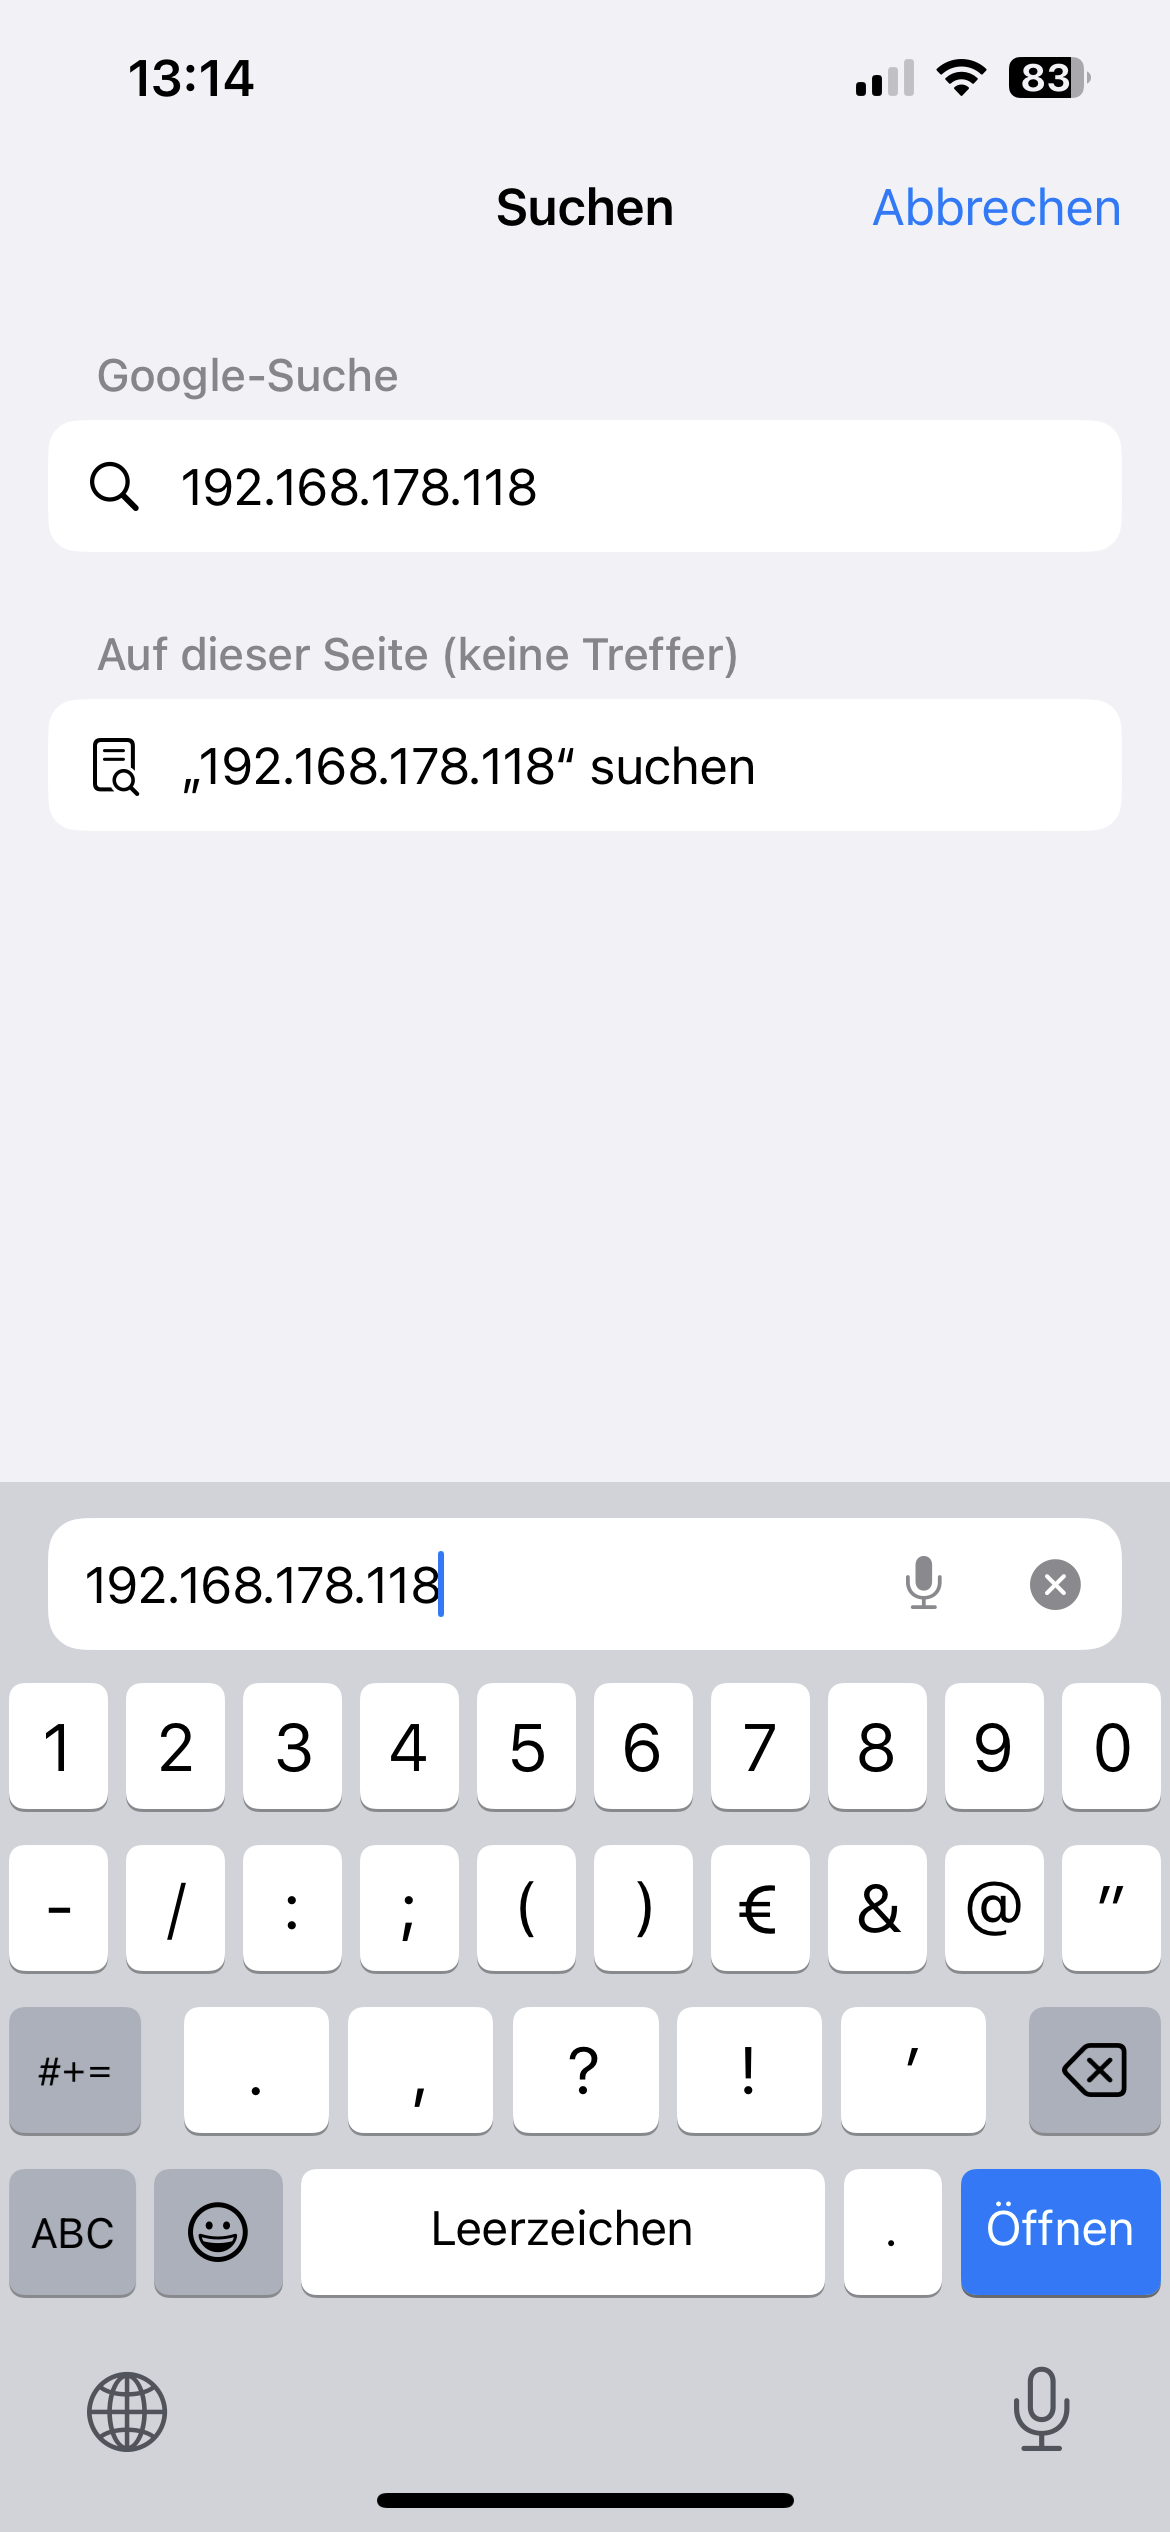
Wenn das geklappt hat, siehst Du im WLAN-Infoscreen die IP-Adresse und URL des Steuerungsmoduls in Deinem Heimnetzwerk.
Die URL, um die Anzeige zu konfigurieren, kannst Du dann in Deinem Browser eingeben.
Select your home WLAN via the „WiFi SSID“ dropdown and enter the WLAN password of your home network in the „PWD“ field. Press the Save button to save the settings. The module then restarts and tries to connect to your WLAN.
If this works, you will see the IP address and URL of the control module in your home network in the WLAN info screen.
You can then enter the URL to configure the display in your browser.

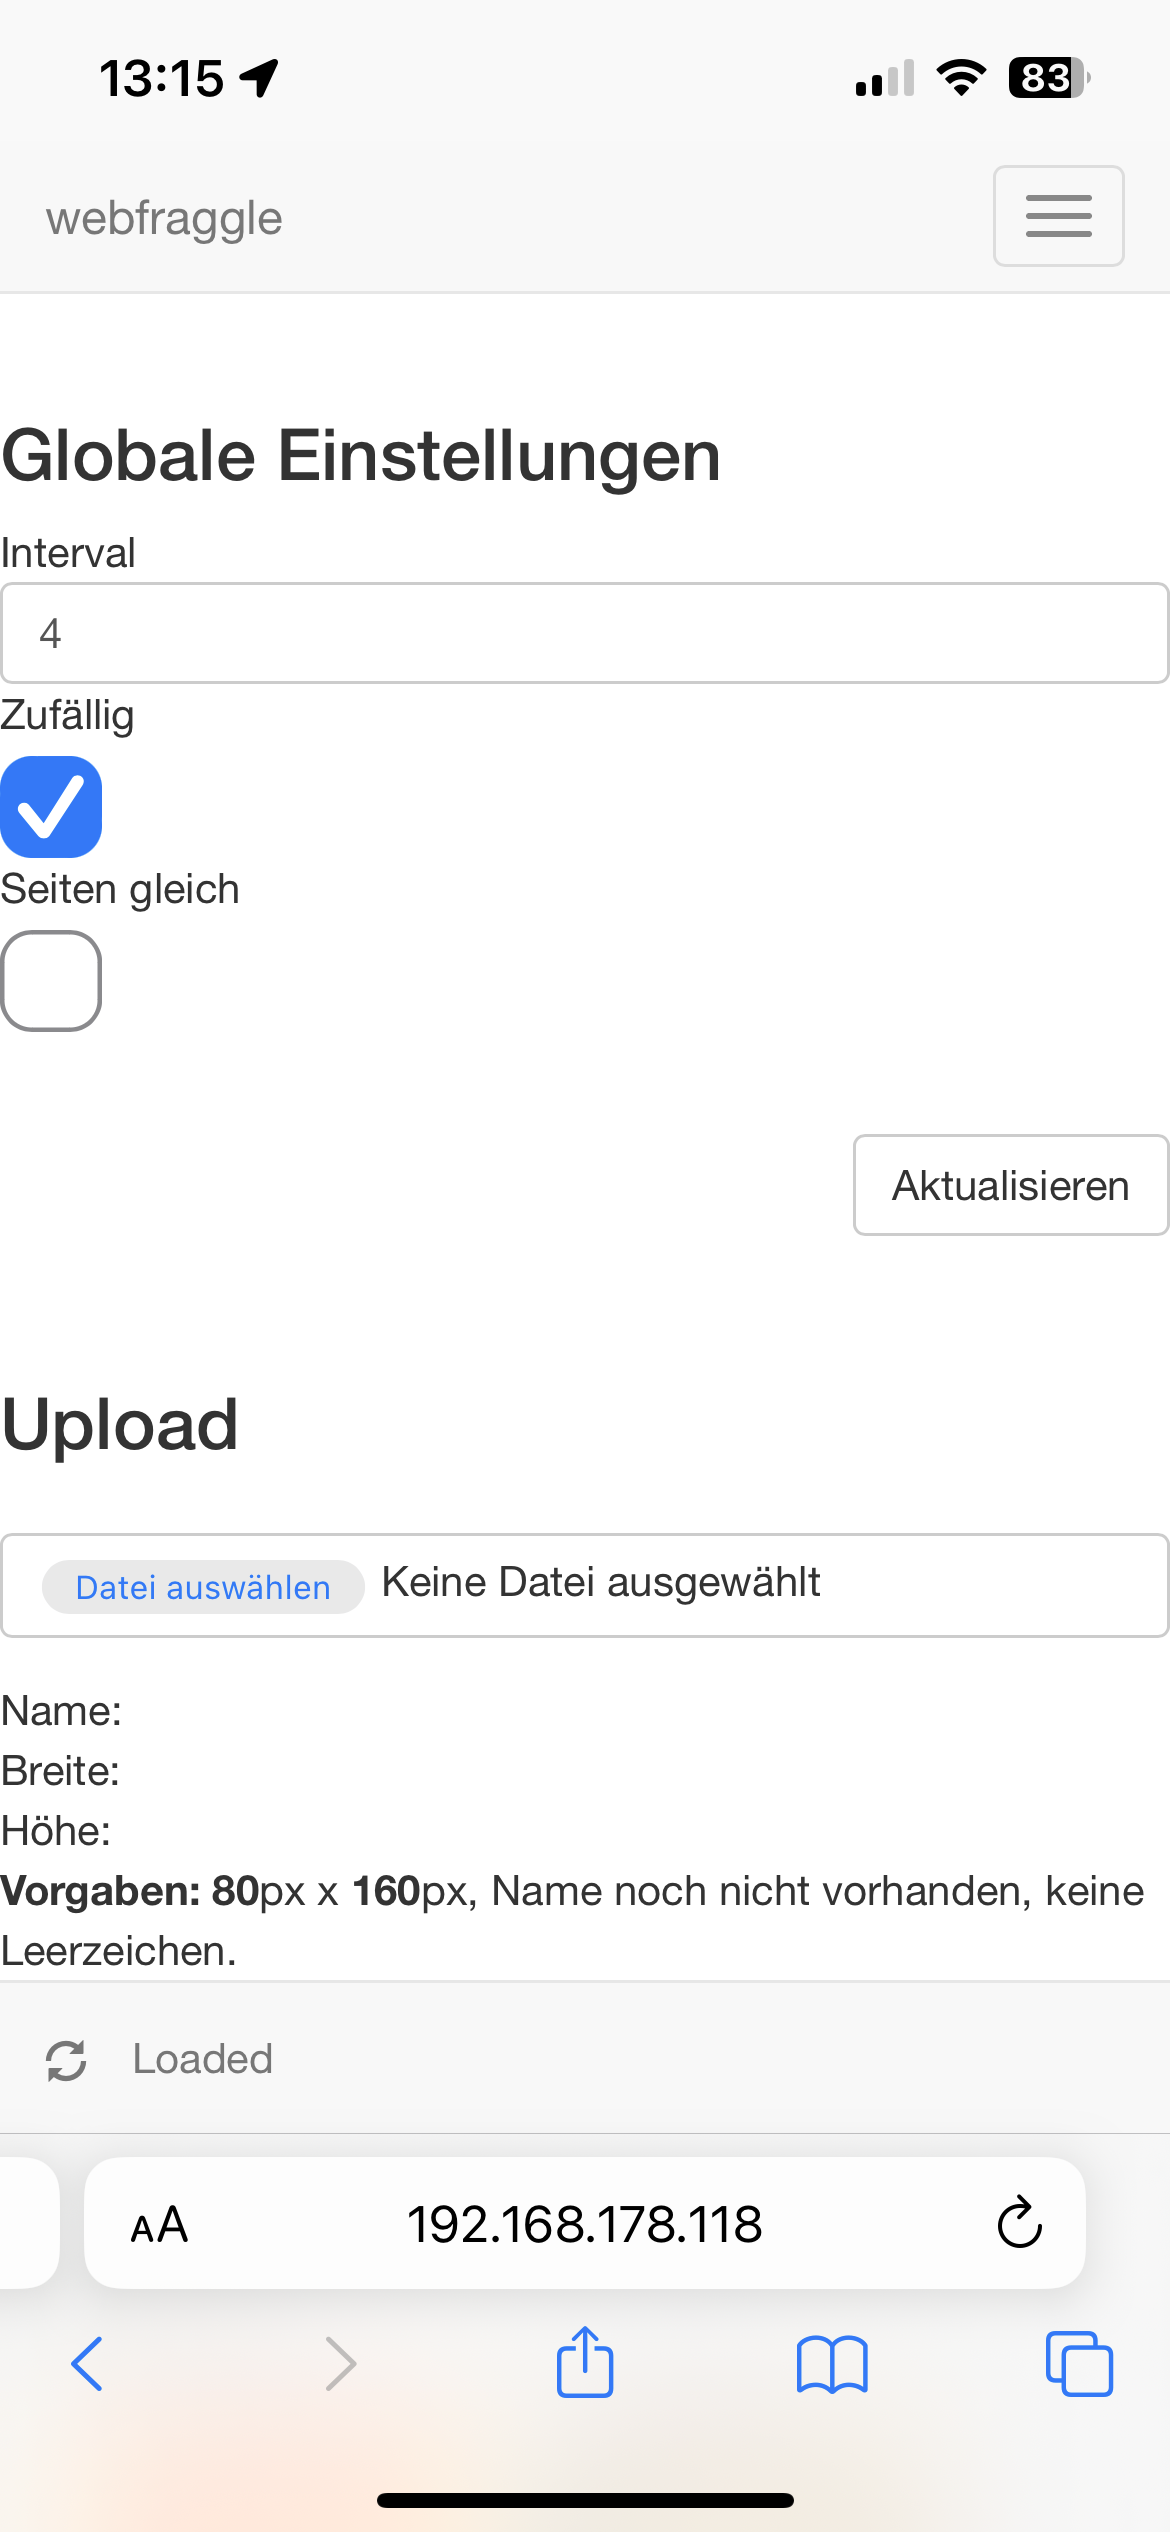
Um die Anzeige zu an deine eigenen Bedürfnisse anzupassen, kannst du eigene Bilder im PNG-Format hochladen und nutzen.
To customise the display to your own needs, you can upload and use your own images in PNG format.

Hinweis / Information
Wenn die Größe noch auf 0px steht, dann einmal die Konfiguration speichern um die Werte zu aktualisieren.
If the size is still set to 0px, save the configuration once to update the values.
Zusammenbau / Assembly
Bitte beachte, dass die beiden Druckteile unterschiedlich sind. Die Kanten sind unterschiedlich geneigt. Zum Zusammenkleben eignet sich Sekundenkleber. Nach dem Kleben lassen sich die Displays einfach in das Gehäuse schieben.
Please note that the two printed parts are different. The edges are slanted differently. Superglue is suitable for gluing them together. After gluing, the displays can easily be pushed into the case.

Downloads
Es passen etwa 15 bis 20 Poster in den Speicher. Du merkst es, wenn die Bilder nicht mehr angezeigt werden. Dann lösche einfach die kaputt hochgeladenen Bilder.
About 15 to 20 posters fit into the memory. You will notice when the pictures are no longer displayed. Then simply delete the broken uploaded pictures.
Standard-Poster 1,14″


Standard-Poster 0,96″


Extra Poster 1,14″ 135x240px


Extra Poster 0,96″ 80x160px